

Showing posts with label tutorial. Show all posts
Showing posts with label tutorial. Show all posts
Thursday, February 28, 2013
Friday, January 27, 2012
Tutorial: How to make BJD Yo-SD Warm dresses and hats from a simple sock
It is very simple and easy to make a cute little winter dress with a warm hat for you little Yo-sd dolls!
All you need is a SOCK! Yes a sock!
You can choose a sock that has a fun print, or just a simple one colored sock.
Take a needle and thread and you are ready to go.
Here is a simple step by step tutorial on how to make this little dres with matching hat.
What do you need?
- A sock.
- Needle and thread
- Scissors
- A ribbon ( this one is optional )

Cutting the sock
Cut you sock up like you see here below!

You need every piece of the sock except the heel piece, you can throw that one away.
Making the dress
Take the top part of the sock and flip the elastic band over and secure it with pins.

Now sew the elastic band.
You can eigther use one sewing line of two. Just do what you prefer.
When you are done you'll have this.

Cutting the Armholes
Make two smal cuts in the sock on eigther side ofthe dress so the hands of your dol can fit through, make sure the holes are big enough.
After that you can choose to sew a border into the hole or not. Do what feels good to you.

Sewing on the extra bottom part.
Flip over a bit of the bottom of the top part of your dress.

Now take the other straight part of your sock and gently slide it over the top part of the dress. and sew the parts together

Flip the bottom of the dress and make a hem in it.

The Hat and adds
Al you need to do with the hat is take the toe part of your sock, roll up a bit of the bottom.
DO NOT SEW IT! Else it will not fit on your dolls head.
if you want to you can also add a little ribbon to give the dress a little spunk.
And than you have this.

And this is how my grils look in their new dresses.

All you need is a SOCK! Yes a sock!
You can choose a sock that has a fun print, or just a simple one colored sock.
Take a needle and thread and you are ready to go.
Here is a simple step by step tutorial on how to make this little dres with matching hat.
Tutorial
What do you need?
- A sock.
- Needle and thread
- Scissors
- A ribbon ( this one is optional )
Cutting the sock
Cut you sock up like you see here below!
Making the dress
Take the top part of the sock and flip the elastic band over and secure it with pins.
Now sew the elastic band.
You can eigther use one sewing line of two. Just do what you prefer.
When you are done you'll have this.
Cutting the Armholes
Make two smal cuts in the sock on eigther side ofthe dress so the hands of your dol can fit through, make sure the holes are big enough.
After that you can choose to sew a border into the hole or not. Do what feels good to you.
Sewing on the extra bottom part.
Flip over a bit of the bottom of the top part of your dress.
Now take the other straight part of your sock and gently slide it over the top part of the dress. and sew the parts together
Flip the bottom of the dress and make a hem in it.
The Hat and adds
Al you need to do with the hat is take the toe part of your sock, roll up a bit of the bottom.
DO NOT SEW IT! Else it will not fit on your dolls head.
if you want to you can also add a little ribbon to give the dress a little spunk.
And than you have this.
And this is how my grils look in their new dresses.
Monday, December 12, 2011
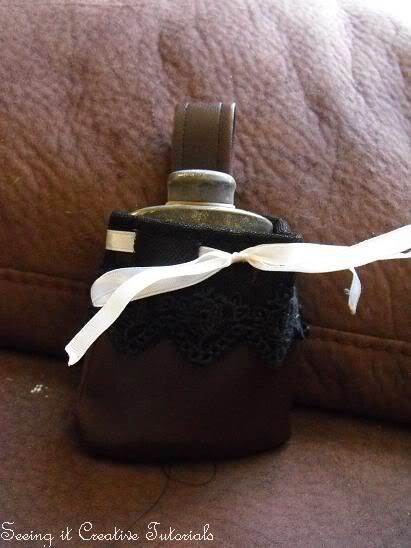
Tutorial: How to make a Steampunk belt Pouch ( for BJD )
The Idea
Last week I had a great idea to make a pouch for my Steampunk outfit.
The idea started out as just a simple small little belt pouch to hold something small.
But when I finished that I made a similar pouch to hold a Yo-sd BJD.
So here is the tutorial....:
How to make a Steampunk Belt Pouch for small objects and Yo-SD BJD dolls.
What do you need?
- Fake Leather Fabric ( you can also use real leather if you want. )
- Needle and thread.
- Decoration fr you pouch if you want to decorate it. For example, Lace, pearls, ribbon Cogs and gears etc.
- Scissors
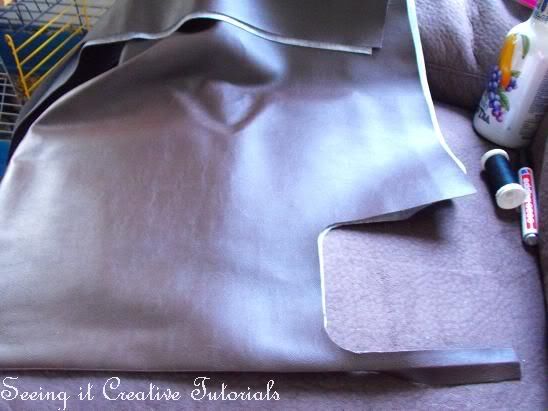
Step 1
Take measurements.
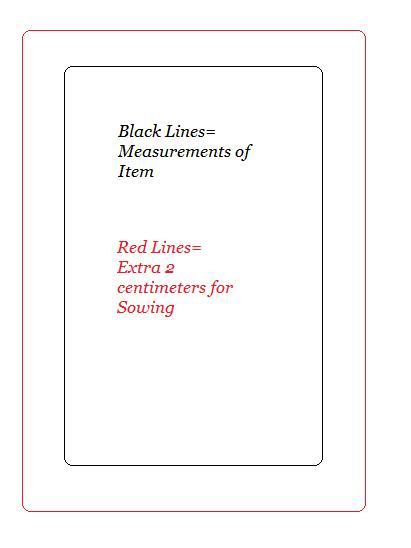
If you want to make a pouch for a specific item be sure to measure up the item and make sure that you mark your measurements down on your fabric. When you have the measurements marked down. add two centimeters all around your measurements. Those extra centimeters are for sowing.
You only need two sides of the same form to make a pouch.
It is easier to mark only one side, and fold the fabric. That way you get two exacly the same shaped pieces.
If you want to make a BJD Pouch. You can place your doll on the fabric and fold the fabric over your doll. That you can use pins to mark down the contour of your doll.

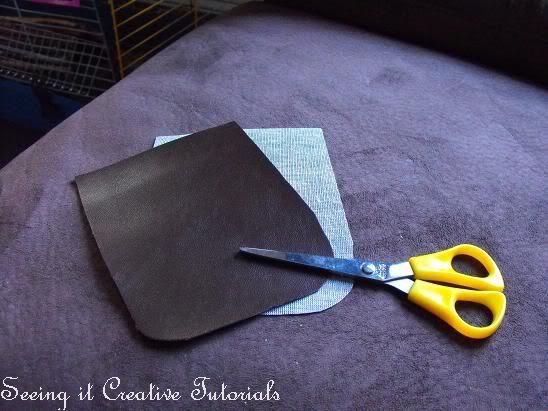
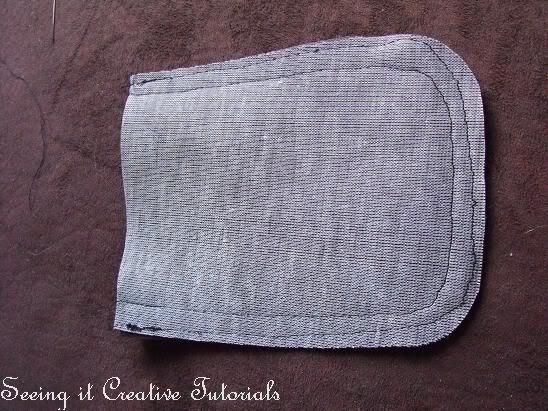
Cut out the two sides of you pouch.
Step 3
Place the two pieced on top of each other. Be sure to put the outside of you pouch on top of eachother so that the inside of you pouch pieces are showing.
Pin the two pieces together.
My tip:

Last week I had a great idea to make a pouch for my Steampunk outfit.
The idea started out as just a simple small little belt pouch to hold something small.
But when I finished that I made a similar pouch to hold a Yo-sd BJD.
So here is the tutorial....:
How to make a Steampunk Belt Pouch for small objects and Yo-SD BJD dolls.
What do you need?
- Fake Leather Fabric ( you can also use real leather if you want. )
- Needle and thread.
- Decoration fr you pouch if you want to decorate it. For example, Lace, pearls, ribbon Cogs and gears etc.
- Scissors
Step 1
Take measurements.
If you want to make a pouch for a specific item be sure to measure up the item and make sure that you mark your measurements down on your fabric. When you have the measurements marked down. add two centimeters all around your measurements. Those extra centimeters are for sowing.
You only need two sides of the same form to make a pouch.
It is easier to mark only one side, and fold the fabric. That way you get two exacly the same shaped pieces.
If you want to make a BJD Pouch. You can place your doll on the fabric and fold the fabric over your doll. That you can use pins to mark down the contour of your doll.
Step 2
Cut out the two sides of you pouch.
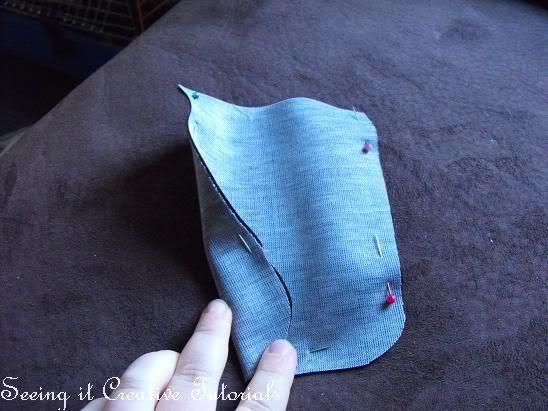
Step 3
Place the two pieced on top of each other. Be sure to put the outside of you pouch on top of eachother so that the inside of you pouch pieces are showing.
Pin the two pieces together.
Step 4
Sowing the 2 pieces together.
I always make two sowing lines. That if for extra safety of the object and for the strongess of the pouch.
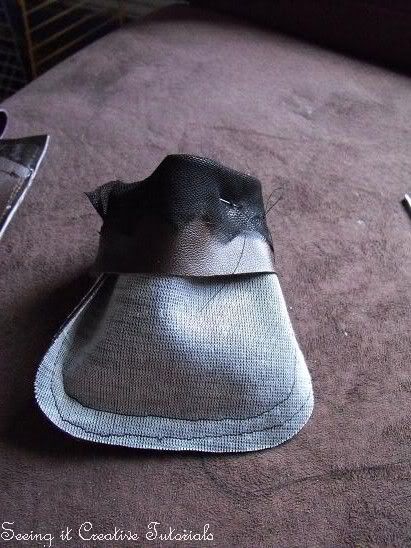
Step 5
When you are done sowing the two pieces together you flip the top of the pouch, so that a little bit of the outside of the pouch is bend over the inside of the pouch.
If you want to use lace on you pouch, my advice is to fold this in place right now, so you can sow that on together with sowing the bend over fabric.
Pin everything down with pins so it will stay straight when you sow it together.
When you pinned eveything down, you can sow the pieces together.My tip:
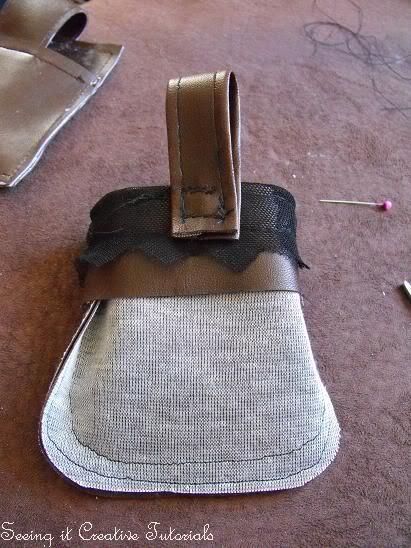
Make two sow lines on the flap. One on top and one at the enge of the flap. It gives the pouch somethings extra and it lookes really pretty.
Step 6
Make a belt loop.
Take a retangular piece of the fabric and fold the side to the middle of the fabric. Hiding the inside of the fabric, and sow the flaps down.
Step 7
Sew the beltloop onto your pouch.
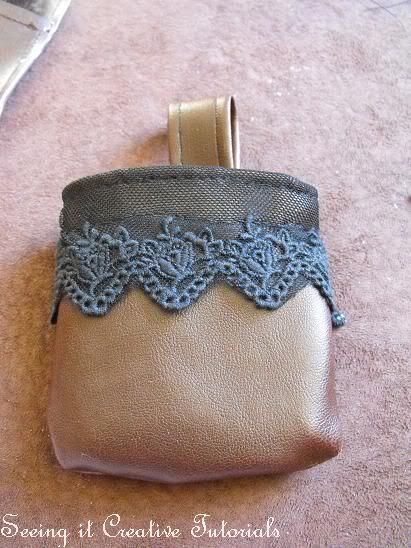
Step 8
Flip the pouch inside out... or outside out. and see how your pouch looks.
Step 9
Make small incisions on the top of the pouch so you can lace a rope of piece of ribbon through.
That ways you have something to pull the pouch shut.
Picture of Pouch with doll will be made soon
Step 10
Decorate you pouch to you own wish with anything you want.
And when you are done with that............
You are DONE! you have your own steampunk belt pouch!!!!
Tuesday, December 6, 2011
Tutorial: How to Tea or Coffee Color fabrics
Do you have some clothing that you want to make look old and used. Give it that authentic old worn and dirty look?
Or do you have some fabric you want to use to make something that you want to look old dirty and worn?
There is a way to do that with some easy to get household things.
Read this small but easy to follow step by step tutorial on how to tea and coffee color fabrics. And you will get the result you want!
What do you need?
- A bucket
- Tea or Coffee ( depends on which color you want to get )
- Hot water
- A big spoon or stick to stir the water with.
Who do you do it?
- The very first step is to boil water, make sure it's good and hot!! to ensure the tea or cofffee will give away all it's color.
- Put the boiled water in a bucket, make sure you have enough water in you bucket to soak the fabric in compleetly. If you only wat to soak and color a small piece of fabric, you could also use a mug.
- Put in the teabag(s) and Coffee and let it sit ans soak for w while so the water will turn dark. untill you can hardly see though it to the bottom.
If you are planning in coloring a big poece of fabric I advice to use atleast 3 teabags or 3 big scoops of coffee. If you are coloring a small piece of fabric you can do with less.
- Put the fabric you want to color into the water. Make sure you drown the whole piece of fabric in tha water for a compleet even color. If you want some pieces to stay the color they are, you can keep those pieces from going into the water.
- Let the fabric sit in the water for a good 15 minutes, and stirr it around a few times, so the color will get in every fiber of the fabric.
- Take the fabric out and rinse it at the sink or in the shower or bath and hang it out to dry.
And now you have tea or coffee colored fabric, with an old dirty and worn look!
What kind of Tea or Coffee do I use?
If you want to color your fabric with Coffee, you can use regular coffee.
If you want to color your fabric with tea, I recommend English Breakfast tea or English blend
How will the colors be?
If you are looking for a softer brown color you have to choose for tea.
If you are looking for a darker more intens color, you have to choose for Coffe.
Saturday, October 8, 2011
Tutorial : How to make Angel wings for Ball Jointed dolls
I wanted to have wings for my dolls for quite some time now.
But it was impossible to find them in the right size. And that is when I decided I could have ago and make them myself.
It actually was easier that I tought it would be.
And I though I would photograph my proces so that I could make a step by step tutorial.
So here is how to make angel wings for SD. (when you want to make wings for smaller or lager dolls or make the wings larger or smaller, you'll have to adjust the sizes to you own will)
Step one:
The things you need.
1: Cartboard piece
2: Glue gun with lot's or glue patern
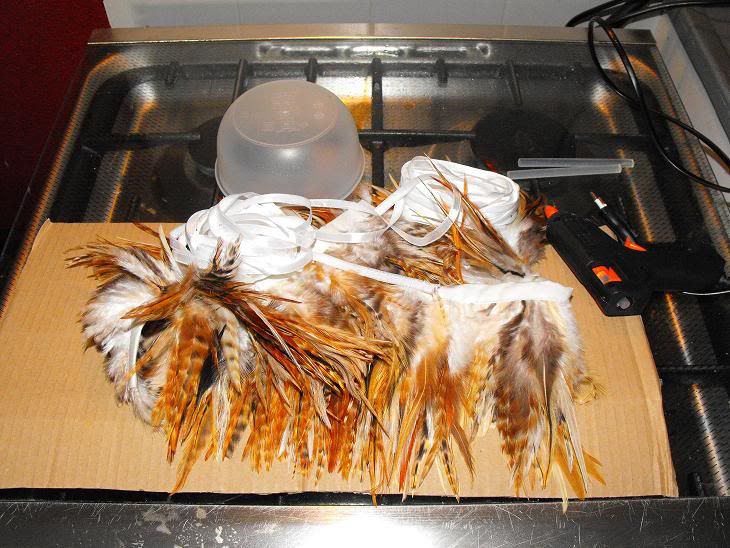
3: Feathers
4: Tape measure
5: A round sized object.
6: A piece of ribbon
Step two
Drawing the countour of the wings on carboard
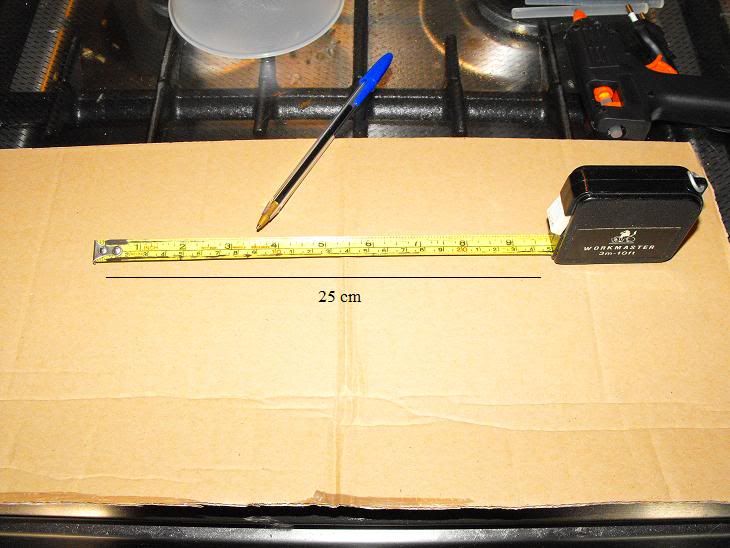
Use you tape measure to make a straigh line onto you cardboard of 25 cm long.
And make a little mark in the precise middle of the line.
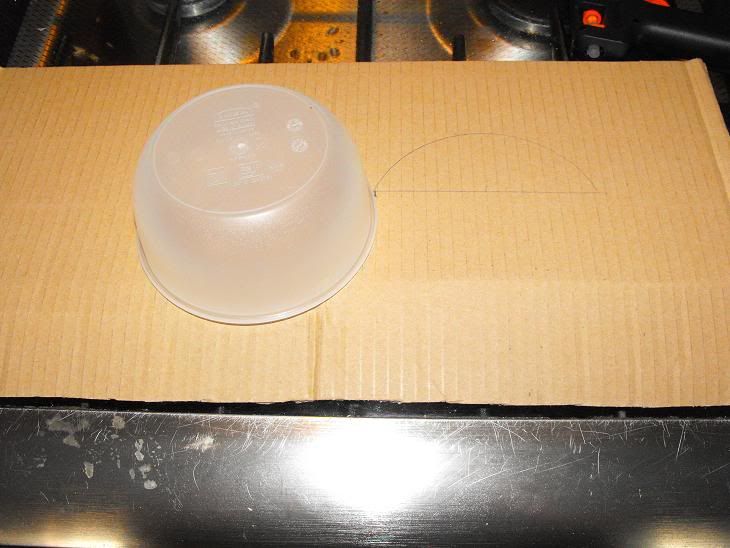
Use the round object to make two even half circles on top of the straight line. You can uyse the mark you made on the half of the straight line to make sure your half circles are even.

Draw a straigt line of 7 cm down from each end of the horizontal line.
Attach the two ends ofthe downward line with the middel of the horizontal line so you get two triangels.
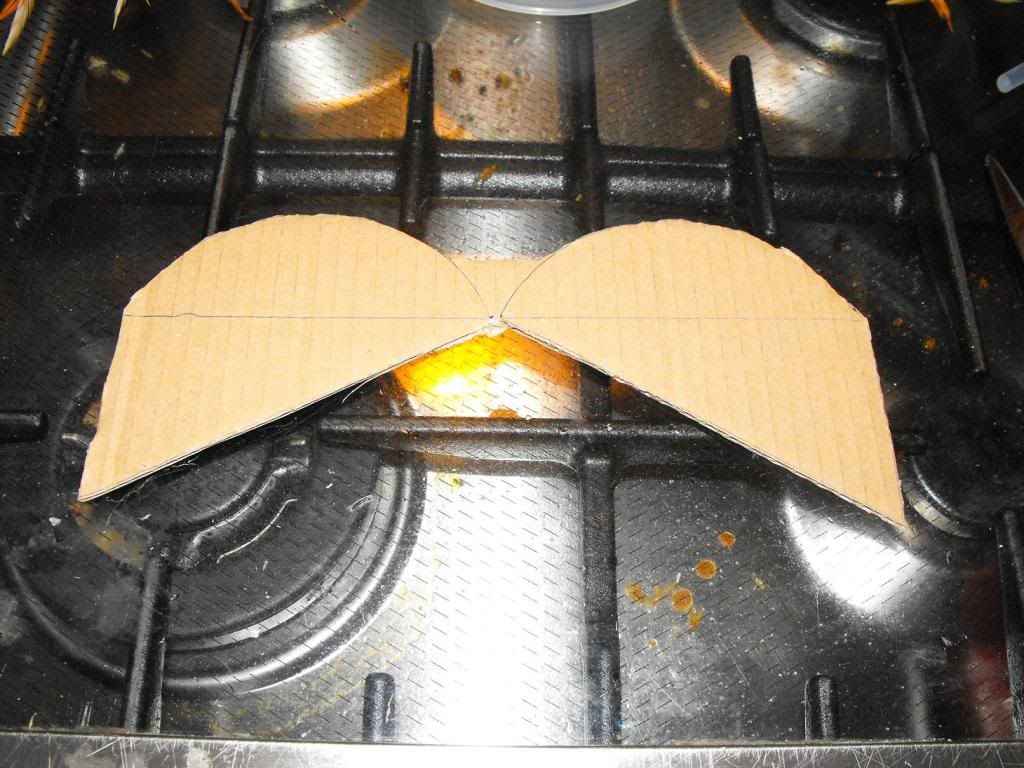
Cut out your wings.
Make sure to make a little bridge between the two half circles for extra stability of your wings.
Step two
Glueing on the feathers

I bought a string of feathers that were sewn together onto a piece of cotton ribbon at the local fabric store. These are real feathers and I found these strings were the chapest way to get my hands on real feathers. You only need about a meter to decorate your wings perfectly. But before I could start glueing I needed to free the feathers from the cotton.
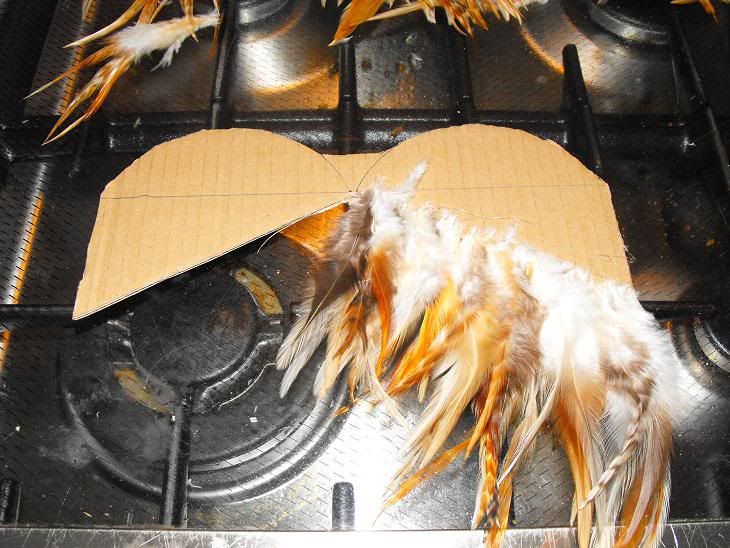
Now you can start glueing.
Start at the very bottom of the wing with a single row of feathers.
Make sure you glue the feathers on as close together as possible for a full effect.
Aftery you gleud on the first row start a new row about a centimeter above the first one and make sure you stay paralel to the first row when you glue on the next line.

Continue glueing on rows until you reach the top.
You can hide the roots of the feathers at the top by glueing on a few feather around the top of the half circle.
Step three
The ribbons
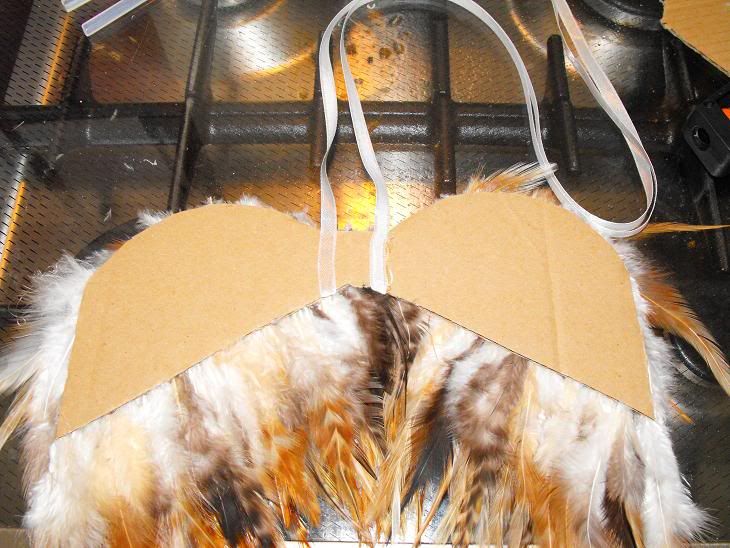
Glue on two ribbons that are excactly the same size on eigther side of the wing's bridge.
Make sure your ribbon is long enough so ou can easily tie the two ribbons together on the back of you doll.
Step four
Go back to step three

Use exactly the same steps of step three to cover the other side of the wing with feathers.
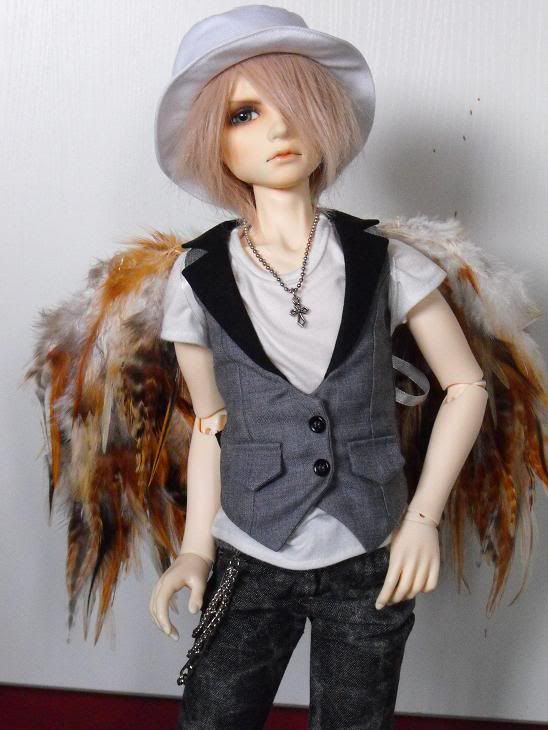
Step five
Strap the wings onto the back of you doll
Subscribe to:
Posts (Atom)